

Nine times out of ten, a dead laptop keyboard isn’t actually dead. It’s a driver conflict, a stray accessibility setting, a Windows update gone sideways, or a ribbon cable that’s shifted slightly loose. Plug in a USB keyboard first.
If it types normally, the hardware is fine, and you’re looking at a driver reinstall, a BIOS update, or a setting quietly swallowing your keystrokes. If nothing works not even a USB keyboard you’re dealing with something deeper, and you’ll want to skip ahead to the advanced fixes below.
Is It Software or Hardware? A 60-Second Test
Most people jump straight to reinstalling drivers or, worse, ordering a replacement keyboard before they’ve actually confirmed what they’re dealing with. Don’t skip this step it’s the single fastest way to avoid wasting an afternoon on the wrong fix.
Grab a USB keyboard, or pair a Bluetooth one if that’s what you have on hand, and plug it in. Open Notepad or any text field and start typing.
- External keyboard works, built-in keyboard doesn’t: this is almost always software, drivers, or a loose internal cable not a dead keyboard. Jump to Fix 3 through Fix 12.
- Neither keyboard works, not even in BIOS: something deeper is going on a corrupted input stack, a failing embedded controller, or, less commonly, a motherboard fault. Head to Fix 9 through Fix 13.
- Only certain keys fail (a full row, the number pad, or a WASD-shaped cluster): that pattern points to something physical debris, a worn switch, or old liquid damage. Start with Fix 2 and Fix 12.
| Symptom | Likely Cause | Where to Start |
| Whole keyboard dead, USB keyboard works fine | Driver, Windows setting, or loose cable | Fix 3–8 |
| Keyboard dead everywhere, including BIOS | Ribbon cable, embedded controller, motherboard | Fix 11–13 |
| A few keys unresponsive | Debris, worn switches, spill damage | Fix 2, Fix 12 |
| Keys type the wrong letters | Language/layout setting | Fix 7 |
| Keys repeat or double-type | Filter Keys, driver, or debounce issue | Fix 3, Fix 5 |
| Works after reboot, fails again later | Power management or driver conflict | Fix 5, Fix 8, Fix 9 |
| REPAIR COMET PRO TIP: If your keyboard stopped working right after a Windows update installed, skip straight to Fix 6. In our experience, that single fix resolves a large share of “keyboard not working after update” cases, and it usually takes less time than working through the list in order. |
Why Laptop Keyboards Stop Working: The Short Version
It helps to understand what’s actually happening before you start swapping settings blindly, because it explains why the same symptom “nothing happens when I type” can have such different fixes.
A laptop keyboard talks to Windows through a chain of handoffs: the physical key switch, the embedded keyboard controller, a driver Windows loads at boot, the Human Interface Device (HID) stack, and finally whatever app has focus on your screen. A break anywhere in that chain looks identical from where you’re sitting. Nothing happens when you press a key. But the fix depends entirely on which link actually broke.
A worn-out key switch is a hardware failure at the very first link. A corrupted driver is a break three links in, and it has nothing to do with the physical keyboard at all you could swap the entire keyboard assembly and the problem would come right back.
Filter Keys isn’t a break in the chain so much as Windows deliberately choosing to ignore some of your input. That’s why the diagnostic test above matters more than any single fix on this page: it tells you which link to investigate first instead of guessing and hoping.
Use an Online Keyboard Tester to Pinpoint the Problem
Before committing to a fix, it’s worth confirming exactly which keys are affected instead of going on a general impression that “the keyboard feels off.” A free browser-based keyboard tester search “keyboard tester” and use any reputable one, no download needed shows a virtual keyboard that lights up as you press each physical key.
This matters for two reasons. First, it tells you whether the failure is total or partial, which feeds straight back into the table above. Second, it often catches keys you didn’t realize were affected. A dead function row or numpad is easy to miss day-to-day if you rarely use those keys, but it changes the diagnosis: a driver problem tends to affect keys unevenly and unpredictably, while a physical fault tends to knock out a clean, contiguous group.
One thing I’ve noticed technicians rely on constantly: laptop keyboards are wired in a row-and-column matrix, not as individual switches each with their own wire back to the controller. If a tester shows an entire row or column dead in a grid pattern, that’s a strong signal pointing toward a physical membrane fault rather than software a single break in that matrix knocks out a predictable pattern of keys, never random scattered ones.
Fix 1: Restart Your Laptop the Right Way
Why this happens: Windows keeps the input service and keyboard driver state loaded in memory, and that state can get stuck particularly after the laptop wakes from sleep, resumes from a docked/undocked state, or comes back from a driver crash that didn’t fully recover.
How to confirm it: If the keyboard worked yesterday and simply stopped today with no obvious trigger, this is worth trying first before anything more involved.
How to fix it: Do a full shutdown, not a sleep and not a Fast Startup–assisted restart (more on why that matters in Fix 8). If the laptop won’t respond to a normal shutdown, hold the power button for about 10 seconds to force it off, wait 30 seconds for capacitors to fully discharge, then power back on.
How to know it worked: Type a few characters into any text field the moment you’re logged back in. If the keyboard responds normally, you’re done.
If it didn’t work: Move on to Fix 2 if only some keys are affected, or Fix 3 if the whole keyboard is unresponsive.
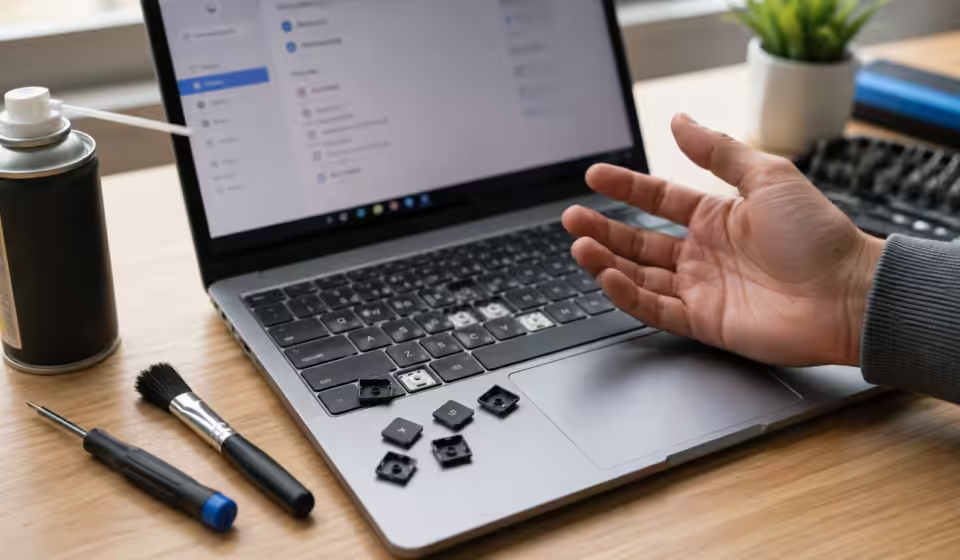
Fix 2: Check for Physical Debris and a Stuck Key
Why this happens: Crumbs, dust, and pet hair work their way under the keys over time and interfere with the switch mechanism underneath. This is one of the most common reasons a handful of keys stop responding while the rest of the keyboard works fine and it’s especially common on laptops that travel in bags or sit on kitchen tables.
How to confirm it: Tilt the laptop toward a light and look closely at the base of the affected keys. Visible crumbs or a buildup of dust around the edges is a good sign this is your problem.
How to fix it:
- Shut down the laptop and unplug it.
- Tilt it to roughly a 75-degree angle and gently tap the back to loosen debris.
- Use a can of compressed air, held upright, in short controlled bursts across the keys.
- For a specific stuck key, gently pry the keycap up with a flat plastic tool. Check your model first some brands, particularly certain ASUS and Samsung ultrabooks, use scissor-switch clips that snap if forced. Clean underneath with a dry microfiber cloth or a cotton swab lightly dampened with isopropyl alcohol.
How to know it worked: Reseat the keycap firmly (you’ll usually feel it click into place) and test the key repeatedly. It should feel consistent, not mushy or sticky.
If it didn’t work: A key that still feels physically wrong after cleaning mushy, stuck down, or not clicking back up may have a damaged switch underneath. That’s a keycap or keyboard replacement issue; see Fix 13.
| WARNING: Never spray compressed air at a steep downward angle directly into the keys. It can push debris further into the switch mechanism instead of clearing it out. And don’t use anything beyond isopropyl alcohol on the switches themselves household cleaners can leave residue that gums up the contacts. |
Fix 3: Turn Off Filter Keys and Sticky Keys
Why this happens: Windows ships with accessibility features designed to help people who have difficulty with rapid or precise keystrokes. Filter Keys ignores brief or repeated keypresses, which is genuinely useful for some users but it also gets triggered by accident, usually by holding a key down for eight seconds or longer, and then the keyboard starts feeling broken for reasons that have nothing to do with hardware.
How to confirm it: Watch for a small on-screen notification or sound when the keyboard “stops working” Windows often flashes a prompt asking if you want to turn Filter Keys on, and it’s easy to miss or accidentally confirm.
How to fix it:
- On Windows 11: Settings → Accessibility → Keyboard → turn off Sticky Keys, Filter Keys, and Toggle Keys.
- On Windows 10: Settings → Ease of Access → Keyboard → turn off the same three toggles.
How to know it worked: If Filter Keys was the culprit, keys start responding normally the instant you flip the switch off. No restart needed.
If it didn’t work: This one setting accounts for a surprising number of “keyboard not responding” reports we see, especially on shared or family laptops where a kid or a cat triggered it without anyone noticing. If disabling it doesn’t change anything, move on to Fix 4.
Fix 4: Run the Windows Keyboard Troubleshooter
Why this happens: Windows includes a built-in diagnostic specifically for input devices that checks driver status, relevant registry values, and known misconfigurations it’s essentially a scripted version of the first few fixes a technician would try manually.
How to confirm it: There’s no downside to running this even if you’re not sure it applies. It’s non-destructive and takes under two minutes.
How to fix it:
- Press Windows + I to open Settings.
- Go to System → Troubleshoot → Other troubleshooters.
- Find Keyboard in the list and click Run.
- Follow the prompts. It’ll apply automatic fixes where it can and report what it changed.
A common mistake people make here: they run the troubleshooter once, see “no problems found,” and give up. That message just means the specific checks it runs didn’t catch anything it doesn’t mean your keyboard is fine, and it definitely doesn’t rule out the driver or update-related fixes further down this list.
How to know it worked: Test typing immediately after it finishes. If it reports a fix was applied, a restart may be required before it takes effect.
If it didn’t work: On some newer Windows 11 builds, Microsoft has started folding standalone troubleshooters into the Get Help app, so if Keyboard isn’t listed under Other troubleshooters, search “Find and fix keyboard problems” from the Start menu instead it launches the same diagnostic under a different entry point.
Fix 5: Update or Reinstall the Keyboard Driver
This is the single most effective fix for a laptop keyboard that stopped working with no obvious cause, and it’s worth understanding why. Windows manages your keyboard through a driver that translates raw hardware signals into keystrokes your applications can actually read.
When that driver crashes, gets corrupted by a bad update, or conflicts with something else running on the system, the physical keyboard can be in perfect condition while Windows simply can’t make sense of what it’s sending.
How to confirm it: Open Device Manager and look for a yellow warning triangle next to any keyboard entry. That’s Windows telling you directly there’s a driver problem this fix should be your first stop when you see it, not your fifth.
How to fix it:
- Right-click Start and open Device Manager.
- Expand Keyboards.
- Right-click your listed keyboard (often shown as “Standard PS/2 Keyboard” or a brand-specific name) and choose Uninstall device. Check the box to delete the driver software if it’s offered.
- Restart your laptop. Windows will detect the keyboard automatically and reinstall a fresh driver during boot.
If uninstalling doesn’t help, go the other direction: Update driver → Search automatically for drivers, or better yet, download the current chipset and keyboard driver directly from your laptop manufacturer’s support page. Manufacturer downloads are frequently a version or two ahead of whatever Windows Update offers, and for laptop-specific hardware like backlit keys or function-row media controls, the manufacturer driver is usually the more complete one.
On Windows 11, check a second location too: under Human Interface Devices, look for an entry like “HID Keyboard Device.” If the entry under Keyboards looks clean but this one shows an error, uninstall that one as well before restarting. Windows 11 shifted some of the input-handling logic into the HID stack that Windows 10 kept entirely under the Keyboards category, so checking only one location can miss the actual conflict.
How to know it worked: After the restart, both entries (Keyboards and, on Windows 11, the HID Keyboard Device) should show with no warning icons, and typing should feel immediate no lag, no dropped characters.
If it didn’t work: If Device Manager shows no keyboard entry at all after reinstalling not even one with an error icon that’s a stronger signal pointing toward Fix 12 rather than anything driver-related. Windows can’t manage a driver for a device it isn’t detecting in the first place.
Fix 6: Roll Back a Recent Windows Update
“Laptop keyboard not working after Windows update” is one of the most common variations of this problem we see, and there’s a real technical reason for it: cumulative updates occasionally ship with regressions in the HID input stack that only show up on specific hardware and driver combinations. Microsoft usually catches and patches these within a week or two, but that’s cold comfort if it happens to be your laptop this time.
How to confirm it: Check Settings → Windows Update → Update history and compare the install date against when the keyboard stopped working. If they line up within a day, this is very likely your cause.
How to fix it:
- Go to Settings → Windows Update → Update history → Uninstall updates.
- Find the most recent update (sorted by date) and click Uninstall.
- Restart and test the keyboard.
How to know it worked: If the keyboard responds normally right after the rollback and restart, you’ve confirmed the update was the cause.
If it didn’t work: Reinstall isn’t necessary if uninstalling didn’t change anything, the update wasn’t the issue, and you should move to Fix 7 or Fix 9. If it did fix things, pause updates for a week or two under Windows Update → Advanced options → Pause updates while Microsoft ships the corrected version, then resume normal updates. Don’t leave updates paused indefinitely you’re trading a keyboard bug for a growing pile of unpatched security issues, which isn’t a good trade.
Fix 7: Check Your Language and Keyboard Layout
Why this happens: If your keys are producing the wrong characters rather than nothing at all, you’re not dealing with a hardware problem this is a layout mismatch, plain and simple. The most common trigger is pressing Windows + Space by accident, which cycles through every keyboard layout installed on the system.
How to confirm it: Type a few letters you know well, like your name. If the output is consistently shifted to different symbols or an unfamiliar layout, this is almost certainly the cause.
How to fix it: Go to Settings → Time & Language → Language & region, click the three dots next to your language, choose Language options, and check which keyboard layout is set as default under Keyboards. Remove any layout you didn’t intentionally add.
How to know it worked: Type the same test phrase again. Characters should match what you’re actually pressing.
If it didn’t work: If removing extra layouts doesn’t resolve it, the issue likely isn’t layout-related at all go back to Fix 5 and confirm the driver is installed correctly.
Fix 8: Disable Fast Startup
Why this happens: Fast Startup speeds up boot times by hibernating the Windows kernel session instead of performing a full shutdown. The tradeoff is that it sometimes fails to reinitialize peripheral drivers cleanly on the next boot including the keyboard driver particularly if a driver update happened since the laptop’s last full, proper shutdown.
How to confirm it: If the keyboard works fine after a full restart but stops responding again after the laptop has been “shut down” and turned back on, Fast Startup is a likely culprit.
How to fix it: Go to Control Panel → Power Options → Choose what the power buttons do → Change settings that are currently unavailable, then uncheck Turn on fast startup. Restart fully not sleep and test again.
How to know it worked: The keyboard should behave consistently across multiple shutdown-and-power-on cycles, not just immediately after a manual restart.
If it didn’t work: Fast Startup issues are usually intermittent by nature, so if you’re still seeing failures after disabling it, the root cause is probably a driver conflict rather than a startup-state issue return to Fix 5.
Fix 9: Scan for Malware and Conflicting Software
Why this happens: Keyloggers, certain remote-access tools, and more commonly in practice third-party keyboard remapping utilities like macro software, gaming overlays, and RGB lighting control apps can intercept or block keystroke input. This tends to show up right after a botched install, a software update, or when two utilities both try to manage input at the same time.
How to confirm it: Open Task Manager → Startup apps and look for anything related to keyboard customization, macros, gaming peripherals, or RGB lighting that you don’t remember needing.
How to fix it: Run a full scan with Windows Security (Settings → Privacy & security → Windows Security → Virus & threat protection → Scan options → Full scan). Separately, disable any suspect startup software, restart, and retest before reinstalling it one at a time.
| EXPERT NOTE: This matters more than people assume for one specific group: IT administrators and power users running virtualization software. If your keyboard behaves normally on the host machine but stops responding inside a virtual machine or the other way around the cause usually isn’t the keyboard at all. It’s the hypervisor’s input capture grabbing keyboard focus and not releasing it properly. Check your VM software’s input settings before assuming a driver problem on the physical machine. VMware’s “Grab Input” behavior and VirtualBox’s host-key release setting are the two most common offenders. |
How to know it worked: Keyboard input should return to normal immediately after disabling the conflicting software, without needing a driver reinstall.
If it didn’t work: A clean malware scan and no suspicious startup entries means you can rule this out move on to Fix 10.
Fix 10: Update Your BIOS/UEFI Firmware
This one is more advanced, but it genuinely matters: part of your keyboard’s embedded controller firmware lives in your BIOS/UEFI, and manufacturers periodically patch bugs there that affect input devices often after a major Windows feature update changes how the OS communicates with embedded controllers.
How to confirm it: Check your manufacturer’s support site for your exact model number and compare your current BIOS version (visible under Settings → System → About, or in BIOS itself) against the latest available release notes. If the changelog mentions keyboard, input, or embedded controller fixes, that’s your sign.
How to fix it: Download the matching BIOS update through your manufacturer’s official tool Dell SupportAssist, HP Support Assistant, Lenovo Vantage, ASUS Live Update, MSI Center, or Samsung Update and follow their instructions exactly. Keep the laptop plugged into power throughout the entire process.
| WARNING: A failed or interrupted BIOS update can, in rare cases, prevent the laptop from booting at all. Only attempt this if you’re genuinely comfortable following the manufacturer’s exact process, and back up anything important first. This is not the step to rush. |
How to know it worked: After the update completes and the laptop restarts, test the keyboard both in BIOS and once Windows loads.
If it didn’t work: If a current BIOS was already installed, or the update didn’t change anything, move to Fix 11 to narrow down whether the issue is Windows-side or physical.
Fix 11: Test in BIOS and Safe Mode
This test tells you, definitively, whether Windows is the problem or something lower-level is and it’s one of the more diagnostic steps on this list, so don’t skip it if you’ve made it this far without a fix.
- BIOS test: Restart and press your manufacturer’s BIOS key during boot (commonly F2, F10, F12, Esc, or Del check your model if you’re not sure). If the keyboard works in BIOS but goes dead once Windows loads, the hardware and firmware are fine. The problem is entirely software, and Fix 5 through Fix 9 are where you should be focusing.
- Safe Mode test: Boot into Safe Mode (Settings → System → Recovery → Advanced startup → Restart now, then Troubleshoot → Advanced options → Startup Settings → Restart, and select Safe Mode). Safe Mode loads only essential drivers. If the keyboard works here but not in normal Windows, a third-party driver or startup program is the likely culprit revisit Fix 9.
- If the keyboard fails in BIOS too: this points to a hardware issue most likely the ribbon cable, occasionally the keyboard assembly itself. Move to Fix 12.
How to know it worked: This step is purely diagnostic “working” means you now know which half of this guide to focus on, not that the keyboard is fixed yet.
Fix 12: Check the Keyboard Ribbon Cable
Laptop keyboards connect to the motherboard through a thin ribbon cable that can loosen from everyday flexing, a drop, or after anyone (a technician, or you, during a RAM or SSD upgrade) opened the case for an unrelated reason. This is a common cause of a keyboard that fails everywhere, including in BIOS.
Why this happens: Ribbon cables sit in a ZIF (zero insertion force) connector held by a small locking flap. Over months or years of the laptop flexing slightly during use, or after any disassembly, that connector can work itself just slightly loose enough to break the electrical connection without anything looking obviously wrong.
How to confirm it: If the keyboard failed in both the BIOS test and Safe Mode test above, and an external keyboard works fine, a loose ribbon cable is one of the more likely explanations, especially if the laptop was recently opened, dropped, or has flexed unusually (like being carried in an overstuffed bag).
How to fix it: This step involves opening the laptop chassis, and the process varies significantly by model check your laptop’s service manual for exact steps. Power down completely, remove the battery if it’s user-removable, remove the back panel or keyboard bezel, locate the ribbon cable connector, and check that the locking flap is fully closed and the cable is seated evenly and straight, not at an angle.
How to know it worked: Reassemble and test before fully closing everything back up, if your model allows it. A properly reseated cable should restore keyboard function immediately, with no driver reinstall needed.
If it didn’t work: If reseating the cable doesn’t help, or the cable itself looks frayed, torn, or discolored near the connector, the cable or the keyboard assembly likely needs replacing see Fix 13.
| WARNING: ZIF connectors are delicate. Forcing a cable in at the wrong angle, or lifting the locking flap further than it’s designed to open, can tear the ribbon or crack the connector turning a five-minute fix into a keyboard replacement. If you’re not confident opening your specific model, this is the point where handing it to a professional makes more sense than risking it yourself. |
Fix 13: Replace the Keyboard
If you’ve worked through Fix 1 to Fix 12 and the built-in keyboard still won’t respond while an external USB or Bluetooth keyboard works perfectly fine the built-in keyboard assembly itself has most likely failed. That could be a worn-out membrane from years of use, corrosion from a past spill that only fully failed later, or physical damage from a drop.
| REPAIR VS. REPLACERepair vs. Replace: If the laptop is otherwise in good shape good battery health, no major cosmetic damage, still meets your performance needs replacing just the keyboard is almost always the better financial call than replacing the whole laptop. Keyboard assemblies are inexpensive relative to a new machine, and the rest of the laptop’s hardware isn’t affected by a keyboard fault at all. The math changes if the laptop is already several years old and showing other signs of wear (short battery life, slow performance even after a clean install, thermal throttling) in that case, a keyboard replacement might just be delaying a bigger expense. |
You have three practical paths:
- Manufacturer repair — the most reliable option, especially if the laptop is still under warranty. Always check warranty status before paying out of pocket.
- Third-party repair shop — typically faster and often cheaper than manufacturer service once the warranty has lapsed.
- DIY replacement — keyboard assemblies for most mainstream models are available from third-party parts sellers for roughly $15–$60 depending on the model. Many consumer laptops older ThinkPads especially, along with many Dell and HP models use keyboards secured with a handful of screws or clips rather than adhesive, which makes this a realistic weekend project if you’re comfortable with small electronics and a set of precision screwdrivers.
How to know it worked: Test every key, including modifiers (Shift, Ctrl, Fn) and the number row, immediately after reassembly a replacement that’s slightly misaligned can leave one or two keys unresponsive even though the rest work fine.
If it didn’t work: If a freshly installed keyboard still doesn’t respond at all, double-check the ribbon cable connection made during the swap before assuming the replacement part is defective a loose connection during installation is a far more common cause than a bad part.
Windows 10 vs. Windows 11: What’s Actually Different
The troubleshooting logic is identical across both versions, but Microsoft relocated several settings and changed how troubleshooters are surfaced between the two, which trips people up mid-fix more often than you’d expect.
| Task | Windows 10 | Windows 11 |
| Accessibility keyboard settings | Settings → Ease of Access → Keyboard | Settings → Accessibility → Keyboard |
| Troubleshooters | Settings → Update & Security → Troubleshoot → Additional troubleshooters | Settings → System → Troubleshoot → Other troubleshooters |
| Language/layout settings | Settings → Time & Language → Language | Settings → Time & Language → Language & region |
| Driver management | Device Manager (unchanged) | Device Manager (unchanged), plus a duplicate HID entry in some cases |
If you’ve been following instructions written for the wrong Windows version, that alone can make a perfectly good fix look like it “didn’t work” simply because you couldn’t find the setting where the guide said it would be. Confirm your version first Settings → System → About shows whether you’re on Windows 10 or 11, along with the build number, which matters directly for Fix 6.
Brand-Specific Keyboard Issues
Keyboard behavior, and the fastest path to a fix, varies somewhat by manufacturer mostly because of brand-specific utility software and how each OEM implements their embedded controller and Fn-key logic.
| Brand | Common Cause | Fastest First Step |
| Dell | Dell Peripheral Manager conflicts, or a stuck FN-key lock | Update via Dell SupportAssist; check the F-Lock/FN toggle |
| HP | HP Wireless Button accidentally toggling an input lock on some models; driver bloat from HP Support Assistant | Check the dedicated wireless key; reinstall via HP Support Assistant |
| Lenovo | Lenovo Vantage keyboard settings; on ThinkPads, a stuck TrackPoint driver can interfere with the keyboard driver stack | Update via Lenovo Vantage; reinstall the Lenovo keyboard/UltraNav driver specifically, not just the generic one |
| ASUS | ASUS-specific “Fn Lock” behavior; MyASUS software conflicts | Reinstall the ATK Package (ASUS’s core input driver) from the ASUS support page |
| Acer | Acer Care Center conflicts; occasional BIOS-level Fn key mapping bugs | Update BIOS via Acer’s support page before reinstalling drivers |
| MSI | MSI Center overlay software intercepting keys, common on gaming models | Temporarily close or uninstall MSI Center to isolate the conflict |
| Samsung | Samsung Settings/Update app driver mismatches after a Windows feature update | Run Samsung Update and reinstall the keyboard driver listed there specifically |
A common mistake with all of these brands: people reinstall the generic Windows keyboard driver and assume they’ve covered their bases, when the manufacturer’s utility software is what’s actually managing Fn-key behavior and power-saving states for that keyboard. If your specific brand is listed above, start with the manufacturer tool before the generic Device Manager route.
When to Get Professional Repair
DIY fixes solve the large majority of software-related keyboard problems, but there comes a point where handing it off is the smarter move:
- The keyboard failed after a liquid spill and you notice any unusual smell or visible corrosion.
- The keyboard doesn’t respond even in BIOS, and you’re not comfortable opening the case to check the ribbon cable yourself.
- A key or the keyboard frame has physical damage and no longer sits flush.
- The laptop is still under manufacturer warranty opening the case yourself can void that coverage, even if you don’t damage anything.
- You’ve worked through every fix above, the built-in keyboard still doesn’t respond, and you’re not confident performing a physical replacement.
A qualified technician can also test the embedded keyboard controller directly with diagnostic hardware, which isn’t something software alone can confirm. If you’ve hit a wall after Fix 12, that kind of hands-on diagnostic is often faster than continuing to guess.
Preventive Maintenance Tips
- Clean under and around the keys every one to two months with compressed air more often if you eat near your laptop or have pets in the house.
- Use a thin, breathable keyboard cover if spills or dust are a recurring risk. Avoid thick silicone covers that trap heat during long typing sessions; they can make keys feel mushy over time too.
- Keep manufacturer utility software up to date Dell SupportAssist, HP Support Assistant, Lenovo Vantage, MyASUS, Acer Care Center, MSI Center, Samsung Update. These tools frequently ship input driver fixes before Windows Update catches up.
- Let Windows updates finish fully before shutting down rather than forcing a shutdown mid-install, which is a common and avoidable cause of driver corruption.
- Avoid stacking your laptop closed under other objects on the keyboard side sustained, uneven pressure over time can gradually work the ribbon cable connector loose.
Frequently Asked Questions
Why did my laptop keyboard suddenly stop working?
Most often it’s a corrupted or conflicting driver, a Windows update that shipped with an input bug, or an accessibility setting like Filter Keys getting triggered by accident. Genuine hardware failure is less common than people assume, and it usually follows a specific event a spill, a drop, or the laptop being opened for another repair.
Why is my external keyboard working but not my laptop’s built-in keyboard?
This points to software, a driver, or an internal cable issue rather than a fully dead keyboard, since the external keyboard proves Windows can still process keystrokes normally. Start with Fix 5 (driver reinstall) and Fix 12 (ribbon cable check).
How do I fix a keyboard that’s not working on Windows 11 specifically?
Run the built-in Keyboard troubleshooter (Settings → System → Troubleshoot → Other troubleshooters), reinstall the keyboard driver in Device Manager checking both the Keyboards and Human Interface Devices sections and check Settings → Accessibility → Keyboard for Filter Keys or Sticky Keys being enabled.
How do I fix a keyboard that’s not working on Windows 10 specifically?
The process is nearly identical: Settings → Update & Security → Troubleshoot → Additional troubleshooters → Keyboard, plus a driver reinstall through Device Manager and a check of Ease of Access → Keyboard settings.
Why is my keyboard typing the wrong letters or symbols?
This is a keyboard layout issue, not a hardware fault. Check Settings → Time & Language → Language & region for an unintended layout, and watch out for Windows + Space, which cycles installed layouts if pressed by accident.
Why does my keyboard work in BIOS but not in Windows?
That confirms the hardware and firmware are fine. The problem is a Windows driver, setting, or conflicting software focus on Fix 5, Fix 6, and Fix 9 rather than anything physical.
Can a Windows update really break my keyboard?
Yes, and it’s more common than people expect. Cumulative Windows updates occasionally ship regressions in the HID input stack that affect keyboard drivers on specific hardware combinations. Microsoft typically patches these within one to three weeks; rolling back the update is the fastest workaround in the meantime.
Is it safe to open my laptop to check the keyboard cable myself?
It can be, but it depends on your comfort level and your specific model. Ribbon cable connectors are delicate, and opening the case can void your warranty if the laptop is still covered. If you’re not confident, this is the point to hand it to a professional instead.
How much does it cost to replace a laptop keyboard?
Replacement keyboard assemblies typically run $15 to $60 for parts depending on the model, with DIY installation being free beyond the part cost. Professional replacement, including labor, commonly runs $60 to $150 depending on the shop and laptop model.
Will a keyboard replacement fix repeated or double-typing keys?
Sometimes, but not always double-typing is frequently a driver or debounce-timing software issue rather than a worn switch. Try Fix 3 and Fix 5 before paying for a replacement.
Why does only my spacebar (or one specific key) not work?
A single unresponsive key almost always points to debris or a worn switch under that specific key rather than a system-wide driver problem if it were a driver issue, you’d typically see it affect more than one key. Start with Fix 2.
My laptop keyboard works sometimes but not others what’s going on?
Intermittent failures usually trace back to either a loose ribbon cable connection (worse when the lid is at certain angles) or a power-management setting putting the keyboard controller to sleep too aggressively. Check Fix 8 first, then Fix 12 if the problem persists.
Does a keyboard replacement require reinstalling Windows?
No. Replacing the physical keyboard assembly doesn’t touch your operating system, files, or drivers Windows will detect the new keyboard automatically the next time it boots, the same way it would with any freshly connected input device.
Key Takeaways
- Test with an external keyboard first. It takes ten seconds and immediately tells you whether you’re dealing with software or hardware, which determines everything else you do next.
- Most “laptop keyboard not working” cases are solved by a driver reinstall, disabling Filter Keys, or rolling back a recent Windows update not a replacement. Work through the software fixes before assuming the worst.
- If the keyboard fails even in BIOS, the issue is physical. Check the ribbon cable if you’re comfortable opening the case, or get it looked at professionally if you’re not.
- Keep manufacturer utility software updated. It often ships input driver fixes before Windows Update does, and it’s the most overlooked step on this entire list.
- Know your limits with hardware repair. A delicate ribbon cable connector is not the place to improvise if you’re unsure that’s exactly the kind of five-minute job that turns into a $150 repair when it’s forced.
If you’ve worked through this guide and you’re still stuck, or you’d rather skip straight to a professional diagnosis, Repair Comet can take it from here a hands-on inspection settles in minutes what can take hours to rule out through trial and error at home.